RHEL7 RHCSA

Exam Objectives :
Understand and use essential tools
  • Access a shell prompt and issue commands with correct syntax
  • Use input-output redirection (>, >>, |, 2>, etc.)
  • Use grep and regular expressions to analyze text
  • Access remote systems using ssh
  • Log in and switch users in multiuser targets
  • Archive, compress, unpack, and uncompress files using tar, star, gzip, and bzip2
  • Create and edit text files
  • Create, delete, copy, and move files and directories
  • Create hard and soft links
  • List, set, and change standard ugo/rwx permissions
  • Locate, read, and use system documentation including man, info, and files in /usr/share/doc

Operate running systems

  • Boot, reboot, and shut down a system normally
  • Boot systems into different targets manually
  • Interrupt the boot process in order to gain access to a system
  • Identify CPU/memory intensive processes, adjust process priority with renice, and kill processes
  • Locate and interpret system log files and journals
  • Access a virtual machine’s console
  • Start and stop virtual machines
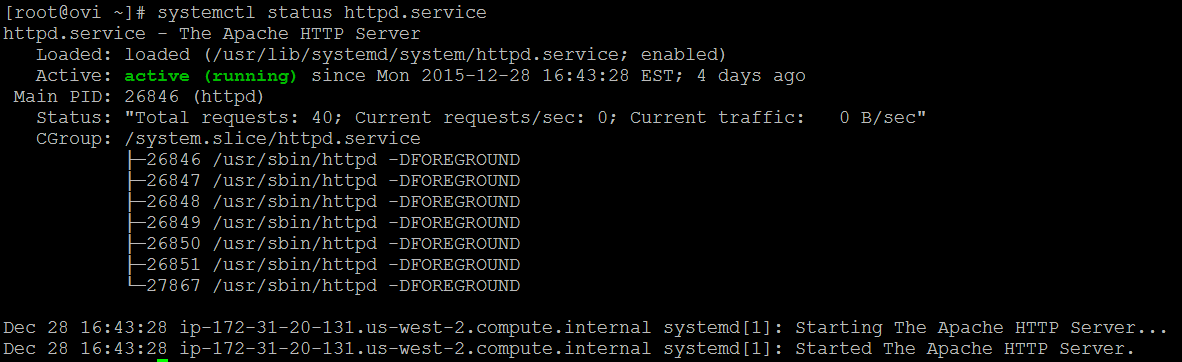
  • Start, stop, and check the status of network services
  • Securely transfer files between systems
Configure local storage
  • List, create, delete partitions on MBR and GPT disks
  • Create and remove physical volumes, assign physical volumes to volume groups, and create and delete logical volumes
  • Configure systems to mount file systems at boot by Universally Unique ID (UUID) or label
  • Add new partitions and logical volumes, and swap to a system non-destructively
Create and configure file systems
  • Create, mount, unmount, and use vfat, ext4, and xfs file systems
  • Mount and unmount CIFS and NFS network file systems
  • Extend existing logical volumes
  • Create and configure set-GID directories for collaboration
  • Create and manage Access Control Lists (ACLs)
  • Diagnose and correct file permission problems
Deploy, configure, and maintain systems
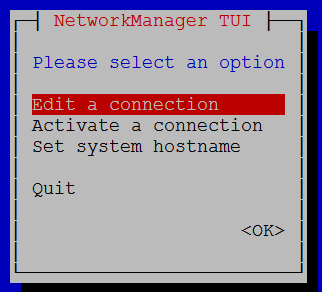
  • Configure networking and hostname resolution statically or dynamically
  • Schedule tasks using at and cron
  • Start and stop services and configure services to start automatically at boot
  • Configure systems to boot into a specific target automatically
  • Install Red Hat Enterprise Linux automatically using Kickstart
  • Configure a physical machine to host virtual guests
  • Install Red Hat Enterprise Linux systems as virtual guests
  • Configure systems to launch virtual machines at boot
  • Configure network services to start automatically at boot
  • Configure a system to use time services
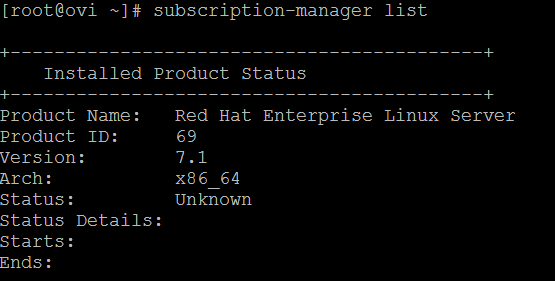
  • Install and update software packages from Red Hat Network, a remote repository, or from the local file system
  • Update the kernel package appropriately to ensure a bootable system
  • Modify the system bootloader
Manage users and groups
  • Create, delete, and modify local user accounts
  • Change passwords and adjust password aging for local user accounts
  • Create, delete, and modify local groups and group memberships
  • Configure a system to use an existing authentication service for user and group information
Manage security
  • Configure firewall settings using firewall-config, firewall-cmd, or iptables
  • Configure key-based authentication for SSH
  • Set enforcing and permissive modes for SELinux
  • List and identify SELinux file and process context
  • Restore default file contexts
  • Use boolean settings to modify system SELinux settings
  • Diagnose and address routine SELinux policy violations

Red Hat 7

RHEL 7 supports Docker containers, systemd, Microsoft-compatible ID management, and XFS for 500TB filesystems

RHEL 7 now uses the xfs file system instead of ext4 by default

#subscription-manager list
subscription_manager

kernel code name – Maipo

[root@ovi ~]# cat /etc/redhat-release
Red Hat Enterprise Linux Server release 7.1 (Maipo)

kernel version

[root@ovi ~]# uname -r
3.10.0-229.el7.x86_64

For RHEL 7, the systemctl command replaces service and chkconfig

#systemctl -t service –state=active

Check if service is enabled

systemctl is-enabled httpd

#systemctl is-enabled httpd
enabled

View run level

[root@ovi ~]# systemctl get-default
multi-user.target

or

[root@ovi ~]# who -r
run-level 3 2015-12-10 03:47

Change the hostname:

#hostnamectl set-hostname hostname

#hostnamectl set-hostname ovi

Configure network interface

/etc/sysconfig/network-scripts/ifcfg-*

nmcli
nmcli – command‐line tool for controlling NetworkManager
nmcli con [add|mod|edit]

nmtui

nmtui – Text User Interface for controlling NetworkManager

nmtui1

nm-connection-editor

View network interface info

ip addr

nmcli dev show

teamdctl
teamdctl — team daemon control tool

brctl

bridge

#bridge
Usage: bridge [ OPTIONS ] OBJECT { COMMAND | help }
where OBJECT := { link | fdb | mdb | vlan | monitor }
OPTIONS := { -V[ersion] | -s[tatistics] | -d[etails] |
-o[neline] | -t[imestamp]

Install apache on Red Hat 7

# yum install httpd -y

# systemctl start httpd.service

to verify if httpd service is running use below command:

# systemctl is-active httpd.service

active

Displaying service status

httpd_status

MariaDB is the default implementation of MySQL in Red Hat Enterprise Linux 7

Install mariadb

yum install mariadb mariadb-server -y

mysql -V
mysql Ver 15.1 Distrib 5.5.44-MariaDB, for Linux (x86_64) using readline 5.

# systemctl enable mariadb.service

ln -s ‘/usr/lib/systemd/system/mariadb.service’ ‘/etc/systemd/system/multi-user.target.wants/mariadb.service’

check if mariadb service is enable

systemctl is-enabled mariadb
enabled

# systemctl start mariadb.service

to verify if service is  running

#systemctl is-active mariadb.service
active

Start the MongoDB service and configure it to start when the system boots:

# systemctl enable mongod.service
# systemctl start mongod.service


Install ambari-server and ambari-agent

[root@phdgrd01 staging]# cp jdk-7u67-linux-x64.tar.gz  /var/lib/ambari-server/resources/

[root@phdgrd01 staging]# ls -latr

total 252336

drwxr-xr-x  3  106 gpadmin      4096 Mar 31 13:44 AMBARI-1.7.1

dr-xr-x—. 6 root root         4096 Apr  2 11:04 ..

-rw-r–r–  1 root root     14893300 Apr  2 11:09 PHD-UTILS-1.1.0.20-centos6.tar.gz

-rw-r–r–  1 root root    101097229 Apr  2 11:12 AMBARI-1.7.1-87-centos6.tar.gz

-rw-r–r–  1 root root         7426 Apr  2 14:49 UnlimitedJCEPolicyJDK7.zip

drwxr-xr-x  3 root root         4096 Apr  2 14:55 .

-rw-r–r–  1 root root    142376665 Apr  2  2015 jdk-7u67-linux-x64.tar.gz


[root@phdgrd01 staging]# cp UnlimitedJCEPolicyJDK7.zip /var/lib/ambari-server/resources/


[root@phdgrd01 staging]# ambari-server setup

Using python  /usr/bin/python2.6

Setup ambari-server

Checking SELinux…

SELinux status is ‘disabled’

Ambari-server daemon is configured to run under user ‘admin’. Change this setting [y/n] (n)?

Adjusting ambari-server permissions and ownership…

Checking firewall…

Checking JDK…

[1] – Oracle JDK 1.7 + Java Cryptography Extension (JCE) Policy Files 7

[2] – Custom JDK

==============================================================================

Enter choice (1):1

JDK already exists, using /var/lib/ambari-server/resources/jdk-7u67-linux-x64.tar.gz

Installing JDK to /usr/jdk64

Successfully installed JDK to /usr/jdk64/jdk1.7.0_67

JCE Policy archive already exists, using /var/lib/ambari-server/resources/UnlimitedJCEPolicyJDK7.zip

Completing setup…

Configuring database…

Enter advanced database configuration [y/n] (n)?

Default properties detected. Using built-in database.

Checking PostgreSQL…

Running initdb: This may take upto a minute.

Initializing database: [  OK  ]


About to start PostgreSQL

Configuring local database…

Connecting to local database…done.

Configuring PostgreSQL…

Restarting PostgreSQL

Extracting system views…

..ambari-admin-1.7.1.87.jar


Adjusting ambari-server permissions and ownership…

Ambari Server ‘setup’ completed successfully.


[root@phdgrd01 staging]# ambari-server start

Using python  /usr/bin/python2.6

Starting ambari-server

Ambari Server running with ‘root’ privileges.

Organizing resource files at /var/lib/ambari-server/resources…

Server PID at: /var/run/ambari-server/ambari-server.pid

Server out at: /var/log/ambari-server/ambari-server.out

Server log at: /var/log/ambari-server/ambari-server.log

Waiting for server start………………..

Ambari Server ‘start’ completed successfully.


[root@phdgrd01 staging]# ambari-server status

Using python  /usr/bin/python2.6

Ambari-server status

Ambari Server running

Found Ambari Server PID: 4787 at: /var/run/ambari-server/ambari-server.pid

test from browser ,

Open http://{ambari.server.host}:8080 in the web browser

Login to the server using admin and the password admin ( You can change later )

ambari

After logging into Ambari, click on the Launch Install Wizard button to enter into cluster creation wizard.