EC2 Container Service (ECS)

EC2 Container Service (ECS)

Amazon EC2 Container Service (Amazon ECS) is a highly scalable, fast, container management service that makes it easy to run, stop, and manage Docker containers on a cluster of Amazon Elastic Compute Cloud (Amazon EC2) instances. Amazon ECS lets you launch and stop container-based applications with simple API calls, allows you to get the state of your cluster from a centralized service, and gives you access to many familiar Amazon EC2 features

AWS Directory Services

AD Connector –  uses your existing on-premises Microsoft Active Directory to access AWS applications and services

Simple AD – is a Microsoft Active Directory – compatible directory that is powered by Samba 4 and hosted on the AWS cloud.

Simple AD is the least expensive option and your best choice if you have 5,000 or less users and don’t need the more advance Microsoft Active Directory

Amazon Cloud Directory

Amazon Cognito

Microsoft AD

iperf

Test Bandwidth on EC2 instances with iperf3

  1. Install iperf

[root@centos64 ~]# yum install iperf iperf3
Loaded plugins: fastestmirror, refresh-packagekit, security
Setting up Install Process
Loading mirror speeds from cached hostfile
* base: mirror2.evolution-host.com
* elrepo: ca.mirror.babylon.network
* epel: mirror.math.princeton.edu
* extras: centos.mirror.rafal.ca
* rpmforge: repoforge.mirror.constant.com
* updates: mirror2.evolution-host.com
Resolving Dependencies
–> Running transaction check
—> Package iperf.x86_64 0:2.0.5-11.el6 will be installed
—> Package iperf3.x86_64 0:3.0.12-1.el6 will be installed
–> Finished Dependency Resolution

Dependencies Resolved

================================================================================
Package          Arch             Version                 Repository      Size
================================================================================
Installing:
iperf            x86_64           2.0.5-11.el6            epel            53 k
iperf3           x86_64           3.0.12-1.el6            epel            65 k

Transaction Summary
================================================================================
Install       2 Package(s)

Total download size: 118 k
Installed size: 279 k
Is this ok [y/N]: y


Downloading Packages:
(1/2): iperf-2.0.5-11.el6.x86_64.rpm                                                                            |  53 kB     00:00
(2/2): iperf3-3.0.12-1.el6.x86_64.rpm                                                                           |  65 kB     00:00
—————————————————————————————————————————————
Total                                                                                                  445 kB/s | 118 kB     00:00
Running rpm_check_debug
Running Transaction Test
Transaction Test Succeeded
Running Transaction
Installing : iperf3-3.0.12-1.el6.x86_64                                                                                          1/2
Installing : iperf-2.0.5-11.el6.x86_64                                                                                           2/2
Verifying  : iperf-2.0.5-11.el6.x86_64                                                                                           1/2
Verifying  : iperf3-3.0.12-1.el6.x86_64                                                                                          2/2

Installed:
iperf.x86_64 0:2.0.5-11.el6                                       iperf3.x86_64 0:3.0.12-1.el6

Complete!
[root@centos64 ~]#


[root@centos64 ~]# iperf -s
————————————————————
Server listening on TCP port 5001
TCP window size: 85.3 KByte (default)
————————————————————

terraform

Terraform is a tool for building, changing, and versioning infrastructure safely and efficiently. Terraform can manage existing and popular service providers as well  as custom in-house solutions.

idempotent

Terraform have  three files with “tf” extension (Terraform extension):

  • main.tf: Code to create our resources and infrastructure.
  • variables.tf: Variables that will act as parameters for the main.tf file.
  • outputs.tf: Anything we might want returned from the resources created. For example: resource name, ID, and so on.

This makes it possible to use a value returned as a parameter for another function later.

1.Download terraform

https://www.terraform.io/downloads.html

Terraform state storage ( local vs remote)

2. Terraform commnads 

terraform version

terraform init

terraform fmt

terrafom validate

terraform plan

terraform apply   ( Deploy )

terraform apply -auto-aprove

terraform modules

configure Terraform backend – AWS S3 backend with Terraform

3. Configure Terraform on AWS 
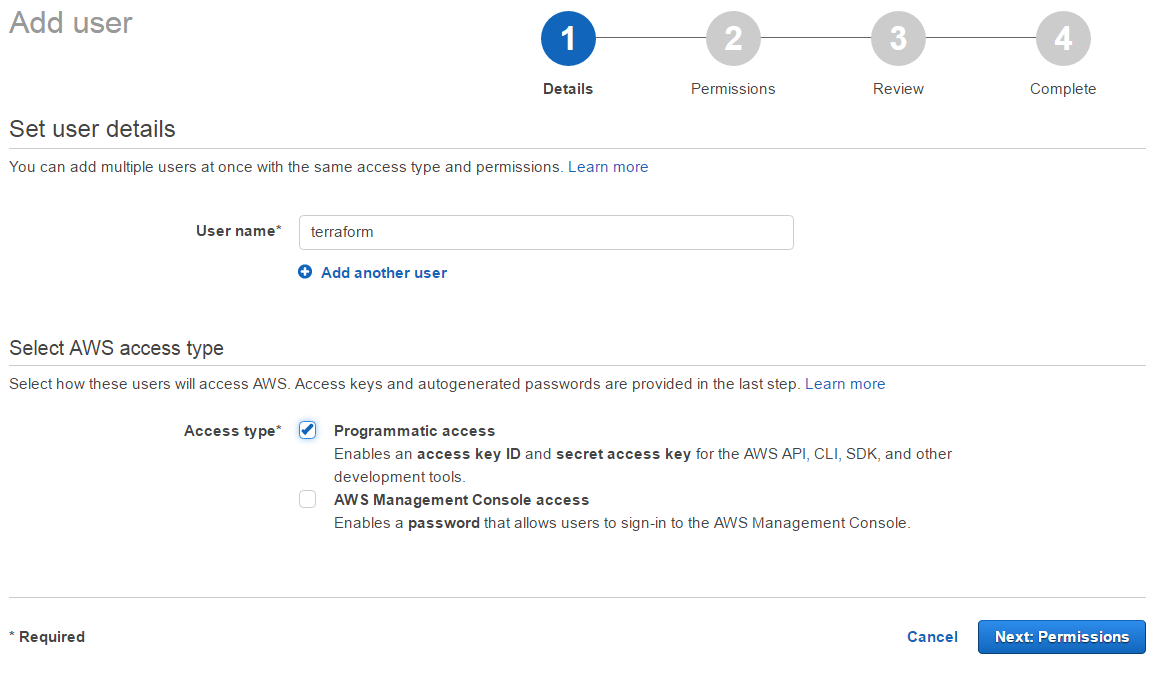
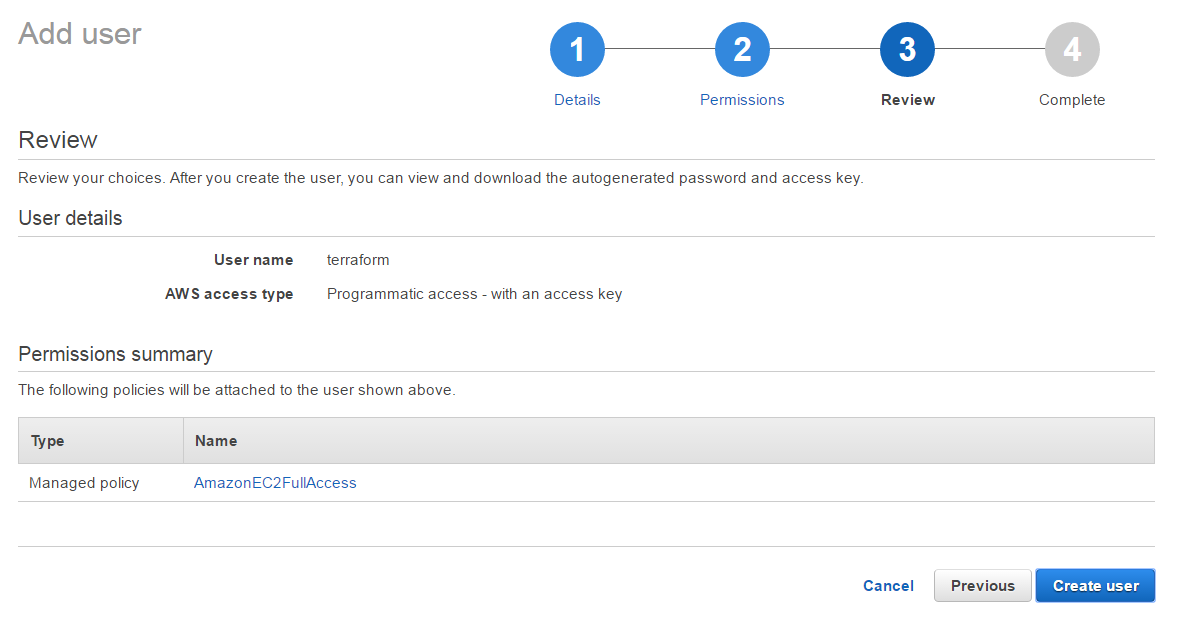
eate a useradd_user

Attach policy to terraform user

attach_policy

[ovidiu@centos64 ~]$ ./terraform plan
Refreshing Terraform state in-memory prior to plan…
The refreshed state will be used to calculate this plan, but
will not be persisted to local or remote state storage.
The Terraform execution plan has been generated and is shown below.
Resources are shown in alphabetical order for quick scanning. Green resources
will be created (or destroyed and then created if an existing resource
exists), yellow resources are being changed in-place, and red resources
will be destroyed. Cyan entries are data sources to be read.

Note: You didn’t specify an “-out” parameter to save this plan, so when
“apply” is called, Terraform can’t guarantee this is what will execute.

+ aws_instance.webserver
ami: “ami-6869aa05”
associate_public_ip_address: “<computed>”
availability_zone: “<computed>”
ebs_block_device.#: “<computed>”
ephemeral_block_device.#: “<computed>”
instance_state: “<computed>”
instance_type: “t2.micro”
key_name: “<computed>”
network_interface_id: “<computed>”
placement_group: “<computed>”
private_dns: “<computed>”
private_ip: “<computed>”
public_dns: “<computed>”
public_ip: “<computed>”
root_block_device.#: “<computed>”
security_groups.#: “<computed>”
source_dest_check: “true”
subnet_id: “<computed>”
tenancy: “<computed>”
vpc_security_group_ids.#: “<computed>”
Plan: 1 to add, 0 to change, 0 to destroy.

[ovidiu@centos64 ~]$ ./terraform apply
aws_instance.webserver: Creating…
ami: “” => “ami-6869aa05”
associate_public_ip_address: “” => “<computed>”
availability_zone: “” => “<computed>”
ebs_block_device.#: “” => “<computed>”
ephemeral_block_device.#: “” => “<computed>”
instance_state: “” => “<computed>”
instance_type: “” => “t2.micro”
key_name: “” => “<computed>”
network_interface_id: “” => “<computed>”
placement_group: “” => “<computed>”
private_dns: “” => “<computed>”
private_ip: “” => “<computed>”
public_dns: “” => “<computed>”
public_ip: “” => “<computed>”
root_block_device.#: “” => “<computed>”
security_groups.#: “” => “<computed>”
source_dest_check: “” => “true”
subnet_id: “” => “<computed>”
tenancy: “” => “<computed>”
vpc_security_group_ids.#: “” => “<computed>”
aws_instance.webserver: Still creating… (10s elapsed)
aws_instance.webserver: Still creating… (20s elapsed)
aws_instance.webserver: Creation complete

Apply complete! Resources: 1 added, 0 changed, 0 destroyed.

The state of your infrastructure has been saved to the path
below. This state is required to modify and destroy your
infrastructure, so keep it safe. To inspect the complete state
use the `terraform show` command.

State path: terraform.tfstate
[ovidiu@centos64 ~]$